I hope you are all having a wonderful weekend!
Cheers!
M J
|
Ok, I'm back. This year has not started off so great. Among other serious issues and accidents, my computer hard drive crashed over a week ago, with NO current back up - whomp, whomp... And believe me, the irony that my Hubby is an IT professional was not lost on me. ;-) Needless to say, I was not feeling very "boosty" to even attempt a Monday Boost this past week. But I digress! We move on and we have learned from our mistakes... I did, however, pull myself out of the depressing mire long enough to dress the front door for winter: 
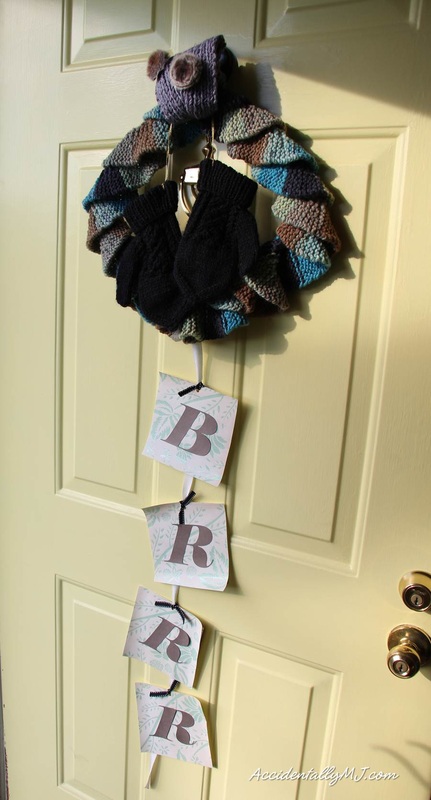
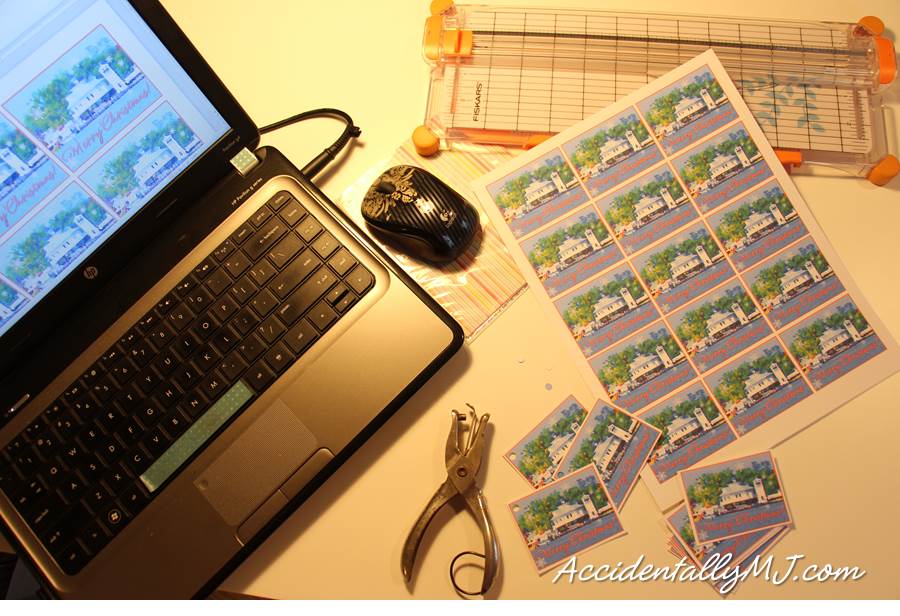
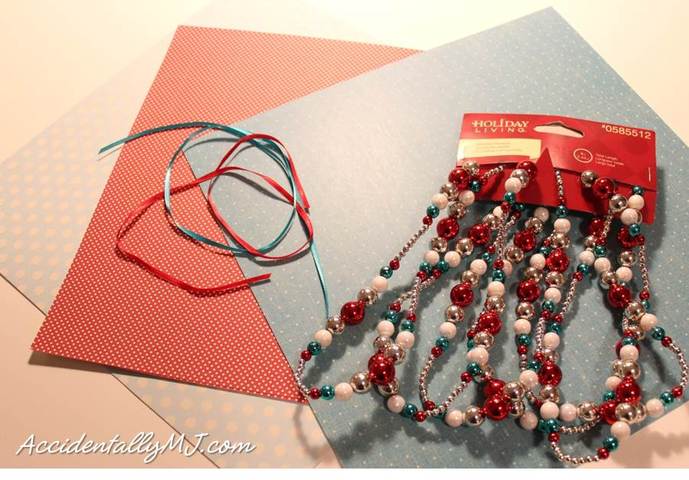
The BRRR... banner is just scrapbook paper and letters cut with my Silhouette. The wreath is made with a scarf, head wrap and mittens that were in my winter wardrobe stash. I just bent a wire hanger into a wreath shape, strung on the scarf and tied on the head wrap and mittens: It's pretty cute for the colder months! We did have a little dusting of snow this past week which negated our monthly work trip into downtown DC. While we missed seeing our colleagues, better safe than sorry, am I right? Besides, it really doesn't suck working in my Boss's living room with a roaring fire! :-) (Oh, and Hubby was able to save all my data in the end!)
I hope you are all having a wonderful weekend! Cheers! M J
1 Comment
How do you label your Christmas gifts? Do you buy tags or do you print your own? Do you chop up last year's Christmas cards to use for gift tags? Well, I've done all of those things, but this year, I wanted to make our gift tags a bit more personal... I used a picture I took from our boat of the lighthouse and used my method for turning a photo into art using this how-to. Then I pasted the picture into MS Word and played around with it until I had the right size to get 15 tags on one sheet of card stock. I added "Merry Christmas" using Word Art and then pasted a few snowflakes for good measure. After printing, all I had to do was use my paper cutter to slice them up and punch a hole in each. They go quite nicely with our wrapping paper: My photo "art" turned out very pretty and I just love curling ribbon! it always reminds me of being a kid and learning how to use the scissors to curl the ribbon. Remember how proud you were when you finally mastered the technique?? AAahhh, the simple joys of childhood!
I hope you are enjoying the season and celebrating in your own special way! Season's Greetings! Cheers! M J This year, I decided to change up my mostly red/white/gold/silver Christmas décor by adding a bit of turquoise. After adding some homemade turquoise pillow covers to the living room this summer, I have really been enjoying the combination of turquoise with my red coral pillows. We can only have small trees on our mantle due to a certain kitty cat that loves to chew on pine needles (real or fake) and then puke them up on our carpet. Yeah, you fellow cat owners will sympathize. Woolite carpet cleaning spray is the bomb, just saying… So the search for small turquoise ornaments began. No dice. Everywhere I looked, nothing! As you may have noticed, I am a frugal decorator. I cannot stand to spend tons of money on something I know I can create on a dime. I did pick up an eight foot length of pretty beaded garland from Lowes that had the colors I liked. Using that as inspiration, my solution was to DIY some new ornaments. Enter the craft supplies! I raided my craft stash and just so happened to have the perfect color scrapbook papers and ribbons for my vision: I created a cutting template in my Silhouette software to cut one inch circles with a perforation down the center of each for folding. All I had to do was click cut and voila! Lots of little circles easily folded in the center: I grabbed a glass of wine, sat down at my desk, turned on some music and got my craft on! It is a tedious little craft, but I tend to enjoy letting go of serious thoughts and just enjoying the process. I used my low temp glue gun to assemble six folded circles with a folded piece of ribbon cut to five inches in the center for hanging: Do you remember making these little guys with glue and construction paper as a kid? Do you remember that one kid in class that always ate said glue? Ha! I remember always grabbing crayons to decorate mine while most of the other kids just went with plain paper. I guess some things never change, because I couldn’t just leave the cut edges of these ornaments bare! I grabbed a few Martha Stewart glitter glue pens and went to town: I think they add just the right little bit of color that I was looking for this year: I think our little silver Rudolph is enjoying the new ornaments! ;-)
2014 has flown by! I still can’t believe Thanksgiving is gone already. Are you getting into the holiday spirit yet? Happy Friday Everyone! Have a great weekend! Cheers! M J I have always loved photography and have made do with whatever camera or camera phone I've had in the past. However, with the recent gift of the DSLR camera from my Hubby, I have accumulated A LOT of photos in a very short time. While they are great photos, I had an itch to create something a bit more artistic. Being the frugal person I am, working with software I already have on my laptop is always a goal. I find that MS Powerpoint is a pretty powerful piece of software. Heck, I do most of my photo editing in it! Today, I wanted to give you a taste of what you can easily do with a photo in Powerpoint. Below is a photo I took at the waterfront park 2 blocks from my home: Here are a few steps to easily create a watercolor-like piece of art from a photo:
Now that you have your desired area of the photo cropped, here is what you do next:
Pretty, isn't it? Who knew you could do that with a few clicks of the mouse?? (Well, I'm sure many people knew this, but, hey, I'm new at it!) You could just print this on plain paper or photo paper, but what fine art is created on copy paper? :-) I inserted a piece of acid free, medium weight, cold press watercolor paper into my ink jet printer, clicked print and this is the result: It turned out even better than I had hoped! I am all for getting out the paints and brushes, but this process was just as satisfying to me. I took the picture, I got digitally jiggy with it and I got a beautiful piece of art - cheap, easy and quick. Now to sign and frame it...
I hope you try this simple technique for creating some personal and frugal art of your own. Have a great weekend everyone! Cheers! M J My Parental units are celebrating their 43rd wedding anniversary this year! Wow! I am truly proud of them for fighting through many trials and tribulations to stay together. I decided to break out my card making supplies and make them something handmade and from the heart. Here is what I used:
I simply cut out my sentiments and the green sheet to the proper sizes and glued them together. I also made a small bow with the ribbon and glued it to the front. I just went into MS Word to create my text boxes to print: Same goes for the inside of the card, but instead of just signing the card (that would just be too easy, right?) I used a few stamps to give our initials a bit of flair: I have had Hallmark card software for ages, but sometimes I want to make something extra special. I think my Parents' anniversary is pretty darn special! Here we are in 1975 - Oh, the hair and I am rocking that coat! LOL! I know I always joke that I was an "accident", but I think I was pretty lucky to be born to two people that would literally die for me. They both taught me a lot and I will be eternally grateful to them. Happy Anniversary Mom & Dad! Love you forever!
Cheers! M J P.S. Mom & Dad, if you see this before you get the card, Sorry! It's on its' way! I really did mail it! ;-) Well, our Friend's Halloween party was a smashing success! We worked for a few weeks decorating and coming up with awesome food ideas. Everything was just perfect and appropriately gross for the night: Does our Friend know how to party or what? Below is a shot of Hubby and I in our full, Day of the Dead get up. Faces painted by moi... And another of us with our Friend, the Spider Queen. That house was covered in spider webs and spiders, everywhere! Our Niece got into the fun and was our photographer for the evening as well. She was the perfect twisted Alice in Wonderland, complete with hair to match... Great job on the pics Niecey!! My other good Friend was able to make it to the party and we threw together the perfect pirate costume in less than 5 minutes flat! Of course, I HAD to paint a bloody scar and stitches on her face. Hey, I already had the paints out! ;-) Our Friend gave out ribbons for different costume awards and Hubby and I got First Place! It's the little things in life... (Sorry, blurry action pic! Note Hubby patting me on the back...) Our group of Neighbors and Friends are so awesome! We had everything from a crazy baseball fan to Popeye to a pocket beagle wearing a pink sweater (that didn't last long!). Hehe... Everyone got into the fun last night! What a great night! We all had so much fun including some Halloween trivia. Now my Friend and I will be cleaning up the spiders in her house for weeks to come... Ha!
Hope you all had a fun and safe Halloween! Cheers! M J Halloween is on a Friday this year peeps! Yay! Our friend is having a Halloween party and we are going all out with creepy decorations and grossly-themed foods. Since this party is going to be so awesome, we had to come up with great costumes we've never done before. Grim Reaper and Ugly Witch? Check. Cowboy and Native American Princess? Check. Venetian couple with gorgeous masks? Check. Hubby the cheerleader and me the lacrosse player? Hilarious Double Check. What really caught my eye this year was the beauty of the sugar skull from the Dia de los Muertos, Mexican celebration. Day of the Dead is the celebration of those who have passed and is an essential part of the Mexican embracement of death as a natural part of life. Here is a sneak peek of our headdress for the evening: Man, did I have fun with the glue gun, or what?? ;-) I picked up the spider tulle at Joann Fabrics, the top hat at the Spirit Halloween store and the black leaves/skulls/skeleton hands at Ben Franklin. The rest of the stuff I had in my craft stash. My headdress is simply a comfy headband I already had with lots of stuff hot glued onto it. I can't wait to show you how it looks with my entire costume, so fun! Hubby's cheap top hat got some hot glue lovin' as well. His words - "That is one pimpin' hat!!" Hehe... We have our costumes all figured out. Now I just have to decide how our skull faces will be painted for Halloween. Hmmmm... :-)
Happy Friday!! Cheers! M J I wanted the wall next to the window to have a pleasant gallery wall that complimented the room design. Unfortunately, none of the old artwork and frames we already had went with the room at all. Cue the spray paint, acrylics and Silhouette machine! This is the view you have walking into the studio: The first piece I worked on was the painting in the center. We had this old frame with a masonite backing that worked perfectly! Only problem was the orangy wood finish. I sprayed it gold and let it dry outside while I set up my easel and got my paint on! I just mixed acrylic paint colors to coordinate with the colors in the room and started brushing on the paint in an abstract pattern – no plan or thought, just going with what my eye liked. After I got my colors on the board, I felt it needed something, so a few black graphics made it complete: The other frames were also sitting in the attic with the rest of the extra stuff from our last house. Sidebar: I never realized how hard it would be to downsize to a smaller house until I had to do it. After spending 13 plus years renovating, decorating and furnishing our first house, it was tough letting go of so many things. But they were just “things” after all, right? Believe me, you get over it! I grew up listening to the Beatles and Let It Be is a beautiful song and message. For the Let It Be picture, I just cut the letters out of some floral scrapbook paper with my Silhouette and stuck them to a dark grey paper backing. The black frame already had the pre-cut, triptych mat. The other two frames were the right size, so one got gold spray paint and the other just needed a good cleaning. They are just some pretty scrapbook papers that I liked. For the white frame, I cut out the “Love” in the same dark grey paper… By the way, how do you photograph reflective items the correct way?? I've read up on this and cannot seem to make anything work! Oh well, I guess I will learn at some point... Here is that little gallery wall in one shot: I love the flow, colors and sentiments - just looking at it makes me happy!
My Mom-in-law has already claimed the painting as her own. I guess I will need to get to work on a Christmas present for her before I come into the studio one day after she visits and find this one missing... :-) I hope you are having a great day! Cheers! M J |
AuthorHi There! I'm MJ, a 40-something professional woman with a love for art, crafting and decorating. Here I hope to share my experiments and inspire others as they have inspired me... Archives
April 2020
Categories
All
|